How to Prevent Injection Molds From Wearing Out So Fast

Time:2026-10-14 Author:Sophia
0%

Injection molds are precision assets, not permanent machines. Every cycle exposes steel surfaces to heat, pressure, friction, moisture, and chemical attack. SPI mold classifications commonly describe expected service life from fewer than 100 cycles to more than one million cycles, depending on design, materials, and maintenance. That range is substantial. It also explains why one mold performs for years while another develops flash, scratches, or sticking within months.

So, why do injection molds wear out so fast? The answer is rarely simple. Glass-filled polymers can abrade gates, runners, and shutoff surfaces. Corrosive additives may attack polished cavities, especially when moisture remains after production stops. Poor venting raises local pressure and can leave burnt deposits around parting lines. Excessive injection speed, unstable cooling, and repeated setup errors add further stress. Small marks matter. They often become expensive defects.

The Plastics Industry Association’s Size & Impact reports place the U.S. plastics industry near $550 billion in annual shipments, showing the scale of production that depends on reliable tooling. Meanwhile, SPI mold classifications and guidance from professional mold builders emphasize planned inspection, suitable steel, correct hardness, and preventive maintenance. These sources support a practical conclusion: mold life is engineered, not guessed. However, cycle-life ratings are not guarantees. They can mislead when resin, pressure, cooling water, and operator habits change. A useful prevention plan must examine real production evidence, including wear patterns, cycle counts, resin formulation, and maintenance records. That is where this guide begins.
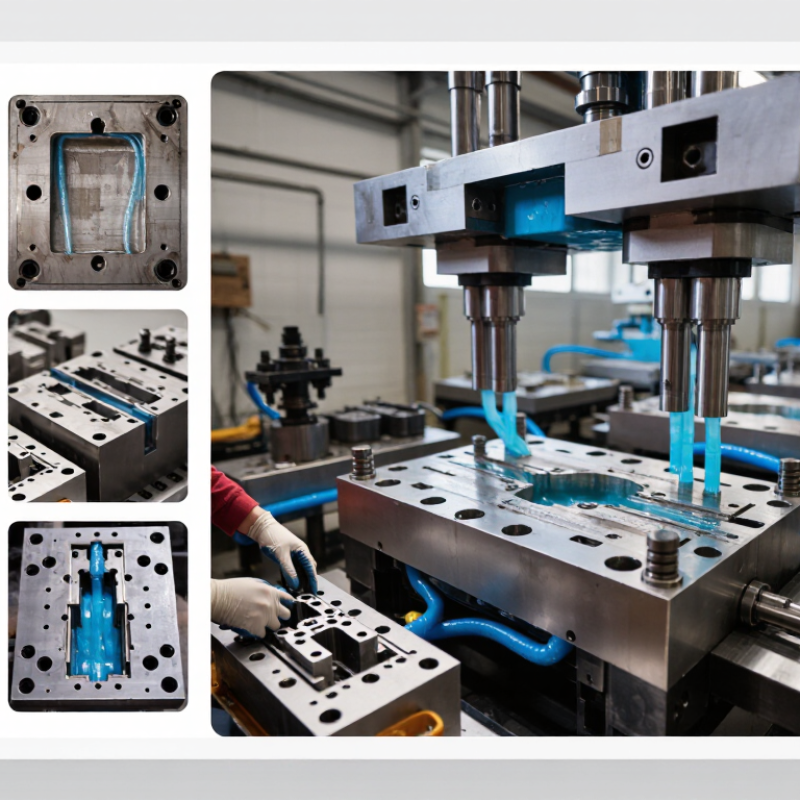
How to Prevent Injection Molds From Wearing Out So Fast

Identify the Main Causes of Injection Mold Wear

Injection mold wear rarely comes from one dramatic failure. It usually develops through small, repeated stresses. The 2023 Plastics Industry Association report valued U.S. plastics shipments above 500 billion dollars, showing how costly mold reliability can become across high-volume production. ASM Handbook, Volume 18, identifies abrasion, adhesion, corrosion, and fatigue as primary tooling wear mechanisms.

Glass-fiber-filled polymers are especially aggressive. Their hard fibers scrape cavity surfaces during filling and ejection. Excessive injection speed can intensify this action. Poorly dried resin may also create hydrolysis, gas, and surface corrosion. Check the mold after short production runs. Look for polishing lines, cloudy areas, burrs, or rising ejection force.

Cooling problems create another hidden cause. Uneven temperatures produce thermal cycling and local stress. Water with high mineral content can block narrow channels, making hot spots worse. Industry maintenance guidance commonly recommends monitoring coolant flow, temperature, and pressure, not just recording machine hours. That detail is easy to miss.

Maintenance timing matters. Waiting for visible flash is often too late. Clean vents and inspect shutoff edges during scheduled stops. Use hardness and surface inspections when practical. Still, preventive intervals should not be copied blindly. A tool running abrasive resin may need earlier service than a similar tool molding unfilled resin. That assumption deserves review.

Choose Durable Mold Materials and Protective Coatings

Injection molds often fail long before their design life because material choice ignores heat, pressure, and abrasive fillers. A durable mold begins with a steel grade matched to the production cycle. Hardened tool steel suits high-volume work, while corrosion-resistant steel helps when resin releases moisture or aggressive additives. For glass-filled materials, wear-resistant alloys can protect gates, runners, and cavities. These areas often show damage first.

A polished surface reduces friction, but polish alone is not enough. Protective coatings can increase hardness and reduce resin adhesion. Use a coating suited to the resin, molding temperature, and expected sliding contact. Before approval, I would test coated inserts through representative cycles. Small trials expose flaking, poor coverage, or dimensional changes. One lesson from maintenance work is simple: coating every surface is not always wise. Some edges need different treatment. Overlooking that detail can shorten service life.

Tips:

Record cycle counts and inspect the gate under magnification. Look for fine scratches, dull patches, and buildup. Clean deposits with approved tools, not improvised abrasives. Keep vents open, because trapped gas can create heat and surface damage. Recheck coating thickness after repairs. Measurements beat assumptions. I have seen a carefully selected mold fail because maintenance records were incomplete. Durable materials help, but disciplined inspection still decides how long the mold performs.

Optimize Molding Temperatures, Pressures, and Speeds

How to Prevent Injection Molds From Wearing Out So Fast

Injection molds rarely fail because of one bad setting. Temperature, pressure, and speed interact at every cycle.

PlasticsEurope’s Plastics—The Fast Facts 2024 report recorded 413.8 million tonnes of global plastics production in 2023. That scale makes small process losses expensive. Keep the mold surface within the resin supplier’s recommended range, usually within ±3°C when possible. A colder mold may shorten cooling time, but it can increase filling pressure and stress near gates. A hotter mold often improves weld-line strength, yet it can extend the cycle. Measure actual steel temperature, not only the controller display.

Pressure should build gradually. Excessive holding pressure can force flash into parting lines and accelerate edge damage. Start with the lowest pressure that achieves stable fill and acceptable shrinkage.

Injection speed needs the same discipline. High speed may reduce hesitation marks, but it also raises shear heating and cavity pressure. Use a staged profile instead of one aggressive setting.

The U.S. Department of Energy’s Industrial Assessment Centers consistently identify process heating and motor systems as important industrial energy loads, so unstable settings waste energy as well as mold life.

I still see operators changing three variables at once. That hides the real cause. Record cavity pressure, melt temperature, cooling time, and part weight for each trial. Review the trend weekly.

Some wear will still appear sooner than expected. That is useful evidence, not failure.

Maintain Proper Ejection, Clamping, and Mold Alignment

Injection molds rarely fail overnight. Uneven ejection, excessive clamping force, and poor alignment usually create gradual damage. During mold inspections, technicians often find polished wear marks around guide pins, ejector plates, and parting surfaces. These marks reveal where pressure is concentrating.

Ejection should remain smooth and balanced. Inspect ejector pins for bending, galling, or different travel lengths. A pin moving 0.3 millimeters late can drag the molded part and damage the cavity edge. Clamping pressure also deserves careful control. Too much force may flatten the parting line, while too little can cause flash and repeated impact.

Alignment matters. Clean guide pillars and bushings before every production run. Check for side loading when closing the mold. It is easy to blame the steel, but poor setup often starts the wear.

Tips: Record ejection force, clamp settings, and alignment checks after each maintenance cycle. Use feeler gauges around the parting line. Small gaps matter. Replace damaged components early, even when production pressure is high. I once saw a mold continue running because its flash seemed minor. The later repair required more machining than expected. That decision was not efficient. Review wear patterns with operators, since they often notice unusual closing sounds first. Keep lubrication controlled; excess grease can attract abrasive dust and hide developing damage.

Follow a Preventive Cleaning and Maintenance Schedule

A preventive cleaning and maintenance schedule protects injection molds from avoidable wear. The U.S. Department of Energy’s Operations & Maintenance Best Practices guide reports that preventive maintenance can reduce costs by 12–18% compared with reactive work. It also notes that reactive repairs may cost three to five times more.

Clean the mold after each production run. Remove resin residue from vents, parting lines, and ejector areas before it hardens. Use approved, non-abrasive cleaners and lint-free wipes. Dry every surface immediately. Moisture left around inserts can create corrosion marks overnight. Keep it boring.

Record cycle counts, cleaning dates, lubricant use, and observed defects. Inspect vents weekly for blockage. Check ejector pins, slides, and guide components for scoring or unusual resistance. A monthly inspection should include clamping surfaces, cooling channels, and fasteners. Compare photographs over time; gradual damage is easier to miss than sudden failure.

The U.S. Department of Energy also identifies predictive maintenance as a lower-cost alternative to emergency repairs, especially when inspections detect early changes. In practice, a simple checklist often works better than an ambitious digital system nobody updates. Our first schedule was too optimistic. Production pressure caused missed inspections. The correction was practical: assign one trained owner, set visible due dates, and require a short condition note after every cleaning. Small errors matter.

How to Prevent Injection Molds From Wearing Out So Fast - Follow a Preventive Cleaning and Maintenance Schedule

Maintenance Area Recommended Frequency Cleaning or Maintenance Action Key Inspection Points Wear Risk if Neglected Required Record
Parting line and mold exterior Every production shift Remove resin deposits, oil, dust, and loose debris with a suitable lint-free cloth and approved mold cleaner. Check for flash buildup, dents, scratches, and contamination near the parting line. High Shift cleaning checklist and operator initials
Vents and gas-trap areas Daily or every 8–12 operating hours Clean vent grooves and burn-prone areas using non-abrasive tools. Do not enlarge vents during cleaning. Look for blocked vents, dark deposits, burn marks, short shots, or trapped gas symptoms. High Vent condition and molding-defect log
Ejector pins, sleeves, and lifters Weekly or every 40–80 operating hours Clean sliding components, inspect for resin buildup, and apply the lubricant specified for the mold and process. Check for sticking, uneven movement, scoring, excessive clearance, and pin return problems. High Ejector movement inspection and lubrication record
Slides, guide pins, and guide bushings Weekly Remove contamination, inspect contact surfaces, and lubricate moving interfaces with a compatible mold lubricant. Inspect for galling, abnormal noise, uneven wear, misalignment, and lubricant contamination. High Guide-system inspection record
Cooling channels and fittings Monthly or every 500–1,000 cycles Check water flow, hose condition, fittings, and signs of scale or corrosion. Flush channels according to the facility procedure. Compare inlet and outlet temperatures, inspect for leaks, and monitor changes in cooling time. Medium Cooling-flow, temperature, and leak report
Cavity and core surfaces Weekly; polish only when required Clean with a non-abrasive method appropriate for the mold steel and surface finish. Avoid aggressive polishing that changes geometry. Check for corrosion, deposits, scratches, pitting, texture damage, and dimensional changes. High Surface condition report with photographs when needed
Hot runner, gates, and nozzle interfaces Every 1,000–5,000 cycles or per process history Inspect gate areas and accessible hot-runner components after safe shutdown and complete cooling procedures. Look for drooling, gate wear, leakage, stringing, blocked flow paths, and temperature abnormalities. High Hot-runner inspection and temperature record
O-rings, seals, and hydraulic or pneumatic connections Monthly and during every mold change Inspect seals and connections for cuts, flattening, leaks, hardening, or chemical attack. Replace damaged parts before production. Verify sealing surfaces, fittings, pressure stability, and absence of oil or coolant contamination. Medium Seal and connection inspection checklist
Mold alignment and clamping surfaces Every 3–6 months Clean and inspect mounting surfaces, check alignment, and verify that clamp plates and locating features are undamaged. Check for uneven contact, clamp marks, misalignment, burrs, and abnormal wear patterns. High Quarterly alignment and mounting inspection
Dimensional and functional condition Every 3–6 months or at defined cycle count Measure critical mold features and compare part dimensions, cycle time, and defect rates with baseline values. Track flash, sink marks, short shots, warpage, dimensional drift, and increasing cycle time. High Preventive maintenance report and trend analysis
Complete teardown and refurbishment assessment Annually or according to cycle count Disassemble qualified components, clean internal surfaces, replace worn consumables, and evaluate repair requirements. Review wear measurements, corrosion, fatigue, cracks, damaged threads, and the remaining service condition. High Annual mold history, repair plan, and approval record

Maintenance intervals should be adjusted according to resin type, glass-fiber content, mold steel, operating temperature, production volume, cooling-water quality, and actual cycle history. Always follow the mold builder’s procedures, lockout requirements, chemical-safety instructions, and lubricant compatibility guidance.

FAQS

What are the main causes of injection mold wear?

Abrasion, adhesion, corrosion, and fatigue are common causes. Repeated small stresses usually matter more than one dramatic failure.

Why does glass-fiber-filled resin wear molds faster?

Hard fibers scrape cavity surfaces during filling and ejection. High injection speed can increase this damage. Check for cloudy areas and polishing lines.

How can early mold wear be detected?

Inspect after short production runs. Look for burrs, rising ejection force, unusual closing sounds, or damaged shutoff edges.

How do cooling problems damage an injection mold?

Uneven temperatures create thermal cycling and local stress. Mineral buildup can block narrow channels and create hot spots. Measure flow, temperature, and pressure.

What problems can poor ejection and alignment create?

Bent ejector pins may drag parts across cavity edges. Uneven movement causes concentrated pressure. A small timing difference can matter.

How should clamping force be controlled?

Excessive force may flatten the parting line. Insufficient force can cause flash and repeated impact. Use feeler gauges to check small gaps.

How often should an injection mold be cleaned?

Clean it after every production run. Remove residue from vents, parting lines, and ejector areas. Dry surfaces immediately. Moisture can leave corrosion marks overnight.

What should a preventive maintenance record include?

Record cycle counts, cleaning dates, lubricant use, and visible defects. Assign one trained owner. A simple checklist often works better than an unused digital system.

When should worn mold components be replaced?

Replace damaged guides, pins, or shutoff components early. Do not wait for obvious flash. Waiting once seemed acceptable, but the later repair required more machining.

Conclusion

Injection molds can wear out quickly when abrasive materials, excessive heat, high pressure, improper lubrication, poor alignment, or inadequate cleaning place constant stress on their surfaces. Understanding why do injection molds wear out so fast is the first step toward extending service life. Manufacturers should select durable mold materials suited to the application and consider protective coatings where appropriate. Controlling molding temperatures, injection pressures, and operating speeds also helps reduce thermal shock, friction, and unnecessary mechanical strain.

Reliable ejection and clamping systems are equally important. Ejector components should move smoothly, while proper mold alignment prevents uneven loading and premature damage. A preventive maintenance schedule should include regular cleaning, inspection, lubrication, and measurement of critical parts. Removing residue before it hardens, checking for wear early, and correcting small alignment or process issues can prevent costly failures. With suitable materials, stable molding conditions, careful operation, and consistent maintenance, injection molds can perform efficiently for a much longer period.

Sophia

Sophia

Sophia is a dedicated marketing professional with an exceptional depth of knowledge about her company's products and services. With a keen understanding of market trends and customer needs, she crafts insightful blog posts that not only inform but also engage readers, enriching the company’s online......