2026 Best Solutions Why Clear Plastic Parts Turn Cloudy?

Time:2026-09-09 Author:Sophia
0%

Clear plastic parts are expected to look bright, smooth, and almost invisible. Yet a freshly molded lens can leave the machine with a gray veil, milky edges, or tiny white streaks. This problem is more complex than a simple material defect. Many manufacturers ask, “why do clear plastic parts get cloudy after molding” when the real cause may involve resin moisture, mold temperature, trapped air, shear stress, or surface contamination. The appearance can change minutes after ejection. It may also worsen after cleaning, assembly, or outdoor exposure.

This 2026 guide examines practical solutions from material preparation through final inspection. Drying conditions matter. Even small moisture levels can create bubbles, splay, or internal haze in sensitive polymers. A mold surface that feels polished may still contain residue or microscopic damage. Injection speed, holding pressure, cooling balance, and gate design also influence optical clarity. Experienced technicians should inspect parts under angled light, compare them with approved samples, and record process changes carefully. A haze meter can support visual checks, but it cannot replace process investigation. Not every cloudy part needs the same correction.

The first adjustment is not always the best one. Sometimes, reducing injection speed improves clarity but creates weld lines. Sometimes, increasing mold temperature helps the surface but extends cycle time. These trade-offs deserve honest review. Reliable results usually come from controlled trials, verified resin drying, clean tooling, and documented evidence. A clear part should remain clear after molding, handling, and reasonable service exposure. That standard requires patience, measurement, and a willingness to question early assumptions.
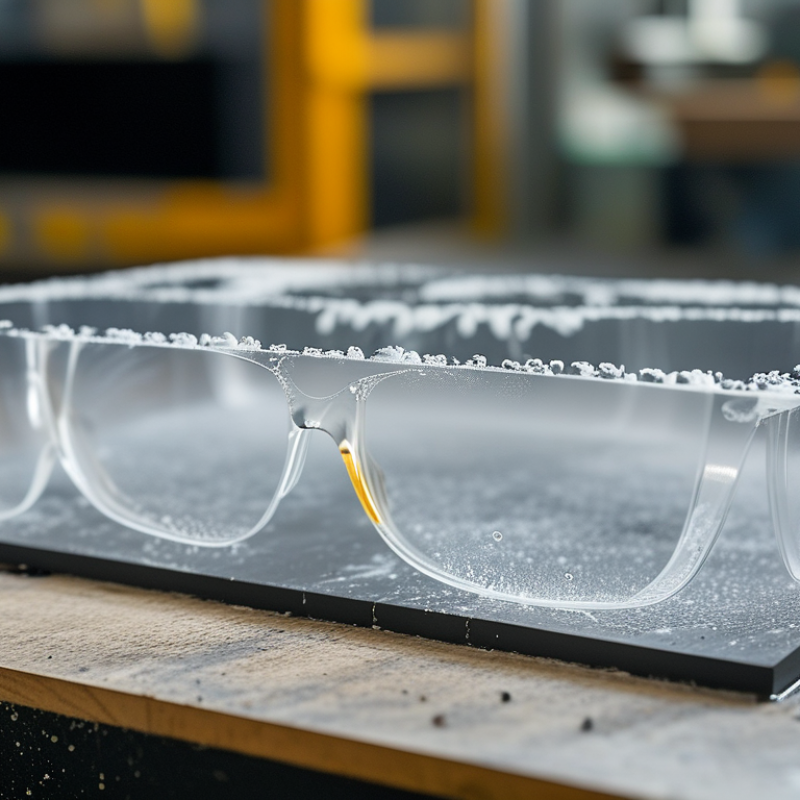
2026 Best Solutions Why Clear Plastic Parts Turn Cloudy?

What Causes Clear Plastic Parts to Turn Cloudy?

Clear Plastic Parts Turn Cloudy: What Causes the Change?

Clear plastic parts usually turn cloudy because light stops traveling cleanly through the material. Moisture can enter during molding, creating tiny voids or silver streaks. Internal stress may also produce microcracks, especially around sharp corners, clips, and drilled holes. Ultraviolet exposure gradually breaks polymer chains and weakens surface clarity. Cleaning chemicals, oils, and alcohol-based products can accelerate that damage. Fine scratches scatter light, even when the part still feels smooth.

ASTM D1003-21 defines haze as the percentage of transmitted light scattered more than 2.5 degrees. A reading near 2% already looks visibly dull in many optical applications, although each product needs its own limit. ISO 4892-2 testing uses controlled xenon-arc exposure to evaluate weathering resistance. These tests help separate surface contamination from deeper aging. A simple wipe test is useful, but it can mislead. Some cloudy parts recover after drying; others reveal permanent stress damage.

Tips: Measure haze before and after cleaning. Check moisture levels in the resin and drying temperature records. Inspect corners under polarized light for stress patterns. Use compatible cleaners, soft lint-free cloths, and shaded storage. Avoid sudden cooling after molding. One overlooked detail is handling pressure. Fingerprints rarely cause permanent cloudiness, but trapped grit can create thousands of tiny scratches. That small mistake may matter more than the plastic formula.

How to Identify the Source of Cloudiness in Plastic Components

Clear plastic parts rarely turn cloudy for one reason. The first task is locating where light scatters. Inspect the surface under angled white light, then rotate the component slowly. Haze that moves with the light may indicate scratches, residue, or surface texture. Haze that remains uniform often points deeper into the material.

I usually begin with a clean, lint-free wipe and deionized water. If the cloudiness disappears briefly, contamination may be present. Check mold release, cleaning agents, fingerprints, and packaging dust. Inspect both sides separately. A mild magnifier can reveal fine abrasions around contact points. Do not rub aggressively. That can create new evidence.

Internal haze needs a different approach. Look for moisture marks, uneven cooling, weld lines, or tiny stress cracks near clips and sharp corners. Compare parts from different mold cavities and production times. If only one cavity produces cloudy components, review venting, temperature control, and drying conditions. If the defect appears after assembly, examine tightening force and chemical exposure. Some cleaners slowly attack stressed plastic.

Use records, not guesses.

A useful test is a controlled cross-section from a rejected sample, when practical and safe. A cloudy outer layer suggests surface damage or chemical attack. A cloudy core may indicate moisture, poor mixing, or crystallization. I once blamed material quality too early; the actual cause was a contaminated polishing cloth. That mistake reinforced a simple lesson: document every test, including failed ones. Different haze sources can look almost identical.

Which Materials and Conditions Increase Plastic Haze?

Clear plastic parts turn cloudy when light meets tiny internal or surface irregularities. Material choice strongly affects this risk. Semi-crystalline plastics, such as PET, PP, and PE, can develop crystalline regions during uneven cooling. These regions scatter light and raise haze. Amorphous materials, including acrylic and polycarbonate, usually provide better clarity, but they can craze under stress or chemical exposure. Recycled content, incompatible additives, fillers, and pigment residues may also create visible scattering. PlasticsEurope’s Plastics—The Facts 2024 reports 413.8 million tonnes of global plastics production in 2023, showing how varied modern material streams have become.

Processing conditions matter just as much. Wet resin can produce bubbles, splay, or microscopic voids, especially in moisture-sensitive grades. Excessive shear, low mold temperature, poor venting, and uneven cooling can leave cloudy flow marks. Scratches from cleaning tools add surface haze. UV exposure, heat, oils, and aggressive cleaners may worsen it over time. ASTM D1003 measures haze from forward light scatter above 2.5 degrees. Yet one test does not explain every failure. That limitation deserves attention.

Tips: Dry moisture-sensitive resin to the supplier’s validated specification. Keep mold temperature stable. Compare virgin and recycled material separately. Inspect parts under angled light before testing. Check chemical compatibility with the actual cleaner, not plain water. A clear sample can still fail after weeks of stress.

Best Methods to Restore or Replace Cloudy Plastic Parts

Cloudy plastic parts often look permanently damaged, but many can be restored. Start by washing the surface with mild soap and clean water. Grit can create fresh scratches during polishing. For light oxidation, use a plastic-safe polish and a soft microfiber cloth. Work in small circles, then inspect the part under angled light.

For deeper haze, wet sanding may help. Use fine abrasive grades, plenty of water, and steady pressure. Follow with plastic polish and a suitable UV-resistant coating. Do not use strong solvents without checking the plastic type. They may soften the surface or create stress cracks. I have seen a clear cover improve visually, yet lose clarity again after several weeks. That result needs honest evaluation.

Replacement is better when cloudiness comes from internal cracking, chemical attack, warped layers, or failed coatings. The OECD Global Plastics Outlook reports that global plastic waste reached 353 million tonnes in 2019. Repairing a usable part can reduce unnecessary waste, but a weak replacement part creates another failure. Measure transparency, fit, heat exposure, and safety requirements before choosing. ASTM G154 and ISO 4892-3 provide recognized methods for evaluating plastic weathering, although household testing cannot reproduce every service condition. A simple light test helps. If lettering behind the part remains distorted after polishing, replacement is usually more reliable. Capture photos before and after treatment, record the abrasive grade, and allow time for the coating to cure. Small records improve repeatability.

2026 Best Solutions: Why Clear Plastic Parts Turn Cloudy

Cloudiness usually results from surface abrasion, UV degradation, chemical attack, moisture ingress, or internal stress cracking. The chart shows typical refractive-index values for commonly used clear plastics at approximately 589 nm; differences in refractive index can increase visible light scattering when a surface becomes rough, cracked, or contaminated.

Restore

Use cleaning, wet sanding, polishing, and a UV-resistant protective coating when the haze is limited to the surface.

Inspect

Look for crazing, deep scratches, yellowing throughout the material, trapped moisture, or chemical damage before refinishing.

Replace

Replacement is safer when cloudiness is internal, structural cracks are present, or optical clarity cannot be recovered by surface treatment.

How to Prevent Clear Plastic Parts from Becoming Cloudy Again

Clear plastic parts rarely become cloudy for one reason. Dust, oily fingerprints, moisture, ultraviolet exposure, heat, and unsuitable cleaners can all reduce clarity. Prevention starts with knowing the plastic type. Check its technical sheet before choosing a cleaning liquid or protective coating. Not every transparent material reacts the same way.

Handle parts with clean, lint-free gloves. Small scratches matter. Rinse loose dust away before wiping, because dry particles can drag across the surface. Use lukewarm water and a mild, plastic-safe soap.

Wipe gently with a soft microfiber cloth, then rinse completely. Let the part air-dry or pat it carefully. Avoid rough towels, abrasive powders, and untested solvents. Some household cleaners look harmless but may leave a dull film or create tiny cracks.

Keep clear parts away from direct sunlight, heaters, and sudden temperature changes. Store them in clean sleeves, without stacking heavy objects on top. If the part is used outdoors, consider a compatible UV-resistant treatment, but test it on a hidden area first. I have learned this the hard way: one aggressive cleaning can undo months of careful maintenance. No method is perfect. Inspect the surface regularly for haze, stress marks, trapped moisture, or yellowing. If cloudiness returns quickly, the problem may be material degradation rather than surface dirt. In that case, review the molding process, operating temperature, and cleaning routine with a qualified plastics technician.

FAQS

: How can I tell whether cloudiness is on the surface or inside the plastic?

: Inspect the part under angled white light and rotate it slowly. Moving haze often indicates surface damage or residue. Uniform haze may be internal. The answer is not always obvious.

What should I check before polishing a cloudy plastic part?

Wipe it gently with a lint-free cloth and deionized water. Check fingerprints, dust, cleaning agents, and mold residue. Inspect both sides separately. Avoid aggressive rubbing.

How can I identify scratches or surface abrasions?

Use a mild magnifier near clips, edges, and contact points. Fine lines may appear under angled light. Rubbing harder can create new scratches. That can mislead the investigation.

What causes internal haze in clear plastic components?

Possible causes include moisture, uneven cooling, weld lines, stress cracks, poor mixing, or crystallization. Sharp corners and clips deserve close inspection. Compare parts from different production times.

What should I inspect when only some parts become cloudy?

Compare mold cavities, production batches, drying conditions, venting, and temperature control. If cloudiness starts after assembly, check tightening force and chemical exposure. Keep written records.

How can light surface haze be restored?

Wash the part with mild soap and clean water first. For light oxidation, use plastic-safe polish and a soft microfiber cloth. Work in small circles. Inspect the surface repeatedly.

Can wet sanding remove deeper cloudiness?

Wet sanding may help with deeper surface haze. Use fine abrasive grades, plenty of water, and steady pressure. Follow with suitable plastic polish and a compatible protective coating. Results may fade later.

When is replacement safer than repair?

Replacement is usually better for internal cracking, chemical attack, warped layers, or failed coatings. Measure clarity, fit, heat exposure, and safety needs. If background lettering remains distorted, repair may not be reliable.

How can repair results be documented properly?

Photograph the part before and after treatment. Record cleaning steps, abrasive grade, polishing time, and coating cure time. Include failed tests. Small records improve repeatability.

Conclusion

Clear plastic parts can turn cloudy because of moisture, trapped air, processing stress, surface damage, chemical exposure, or gradual material degradation. To understand why do clear plastic parts get cloudy after molding, it is important to examine molding temperature, cooling speed, drying conditions, mold cleanliness, and storage environment. Haze may appear throughout the part, on the surface, or in localized areas, and each pattern can indicate a different cause. Materials with higher moisture sensitivity or lower resistance to heat, solvents, and ultraviolet exposure may become cloudy more easily under demanding conditions.

The best solution depends on the source of the haze. Minor surface marks may be improved through careful cleaning, polishing, or controlled refinishing, while internal whitening or severe degradation usually requires replacement. Prevention begins with properly dried resin, suitable molding parameters, clean tooling, gradual cooling, protective packaging, and careful selection of compatible cleaning agents. Regular inspection and controlled storage can also help maintain transparency and extend the service life of clear plastic components.

Sophia

Sophia

Sophia is a dedicated marketing professional with an exceptional depth of knowledge about her company's products and services. With a keen understanding of market trends and customer needs, she crafts insightful blog posts that not only inform but also engage readers, enriching the company’s online......